Exploration Guide
Exploration is the heart of Loot Survivor's gameplay loop. Every step into the unknown brings potential rewards and deadly dangers. Understanding the exploration system is key to surviving Death Mountain's treacherous depths.
🎲 Random Encounters: Every exploration is a roll of the dice with equal chances for discovery, obstacles, or beasts!
Exploration Interface
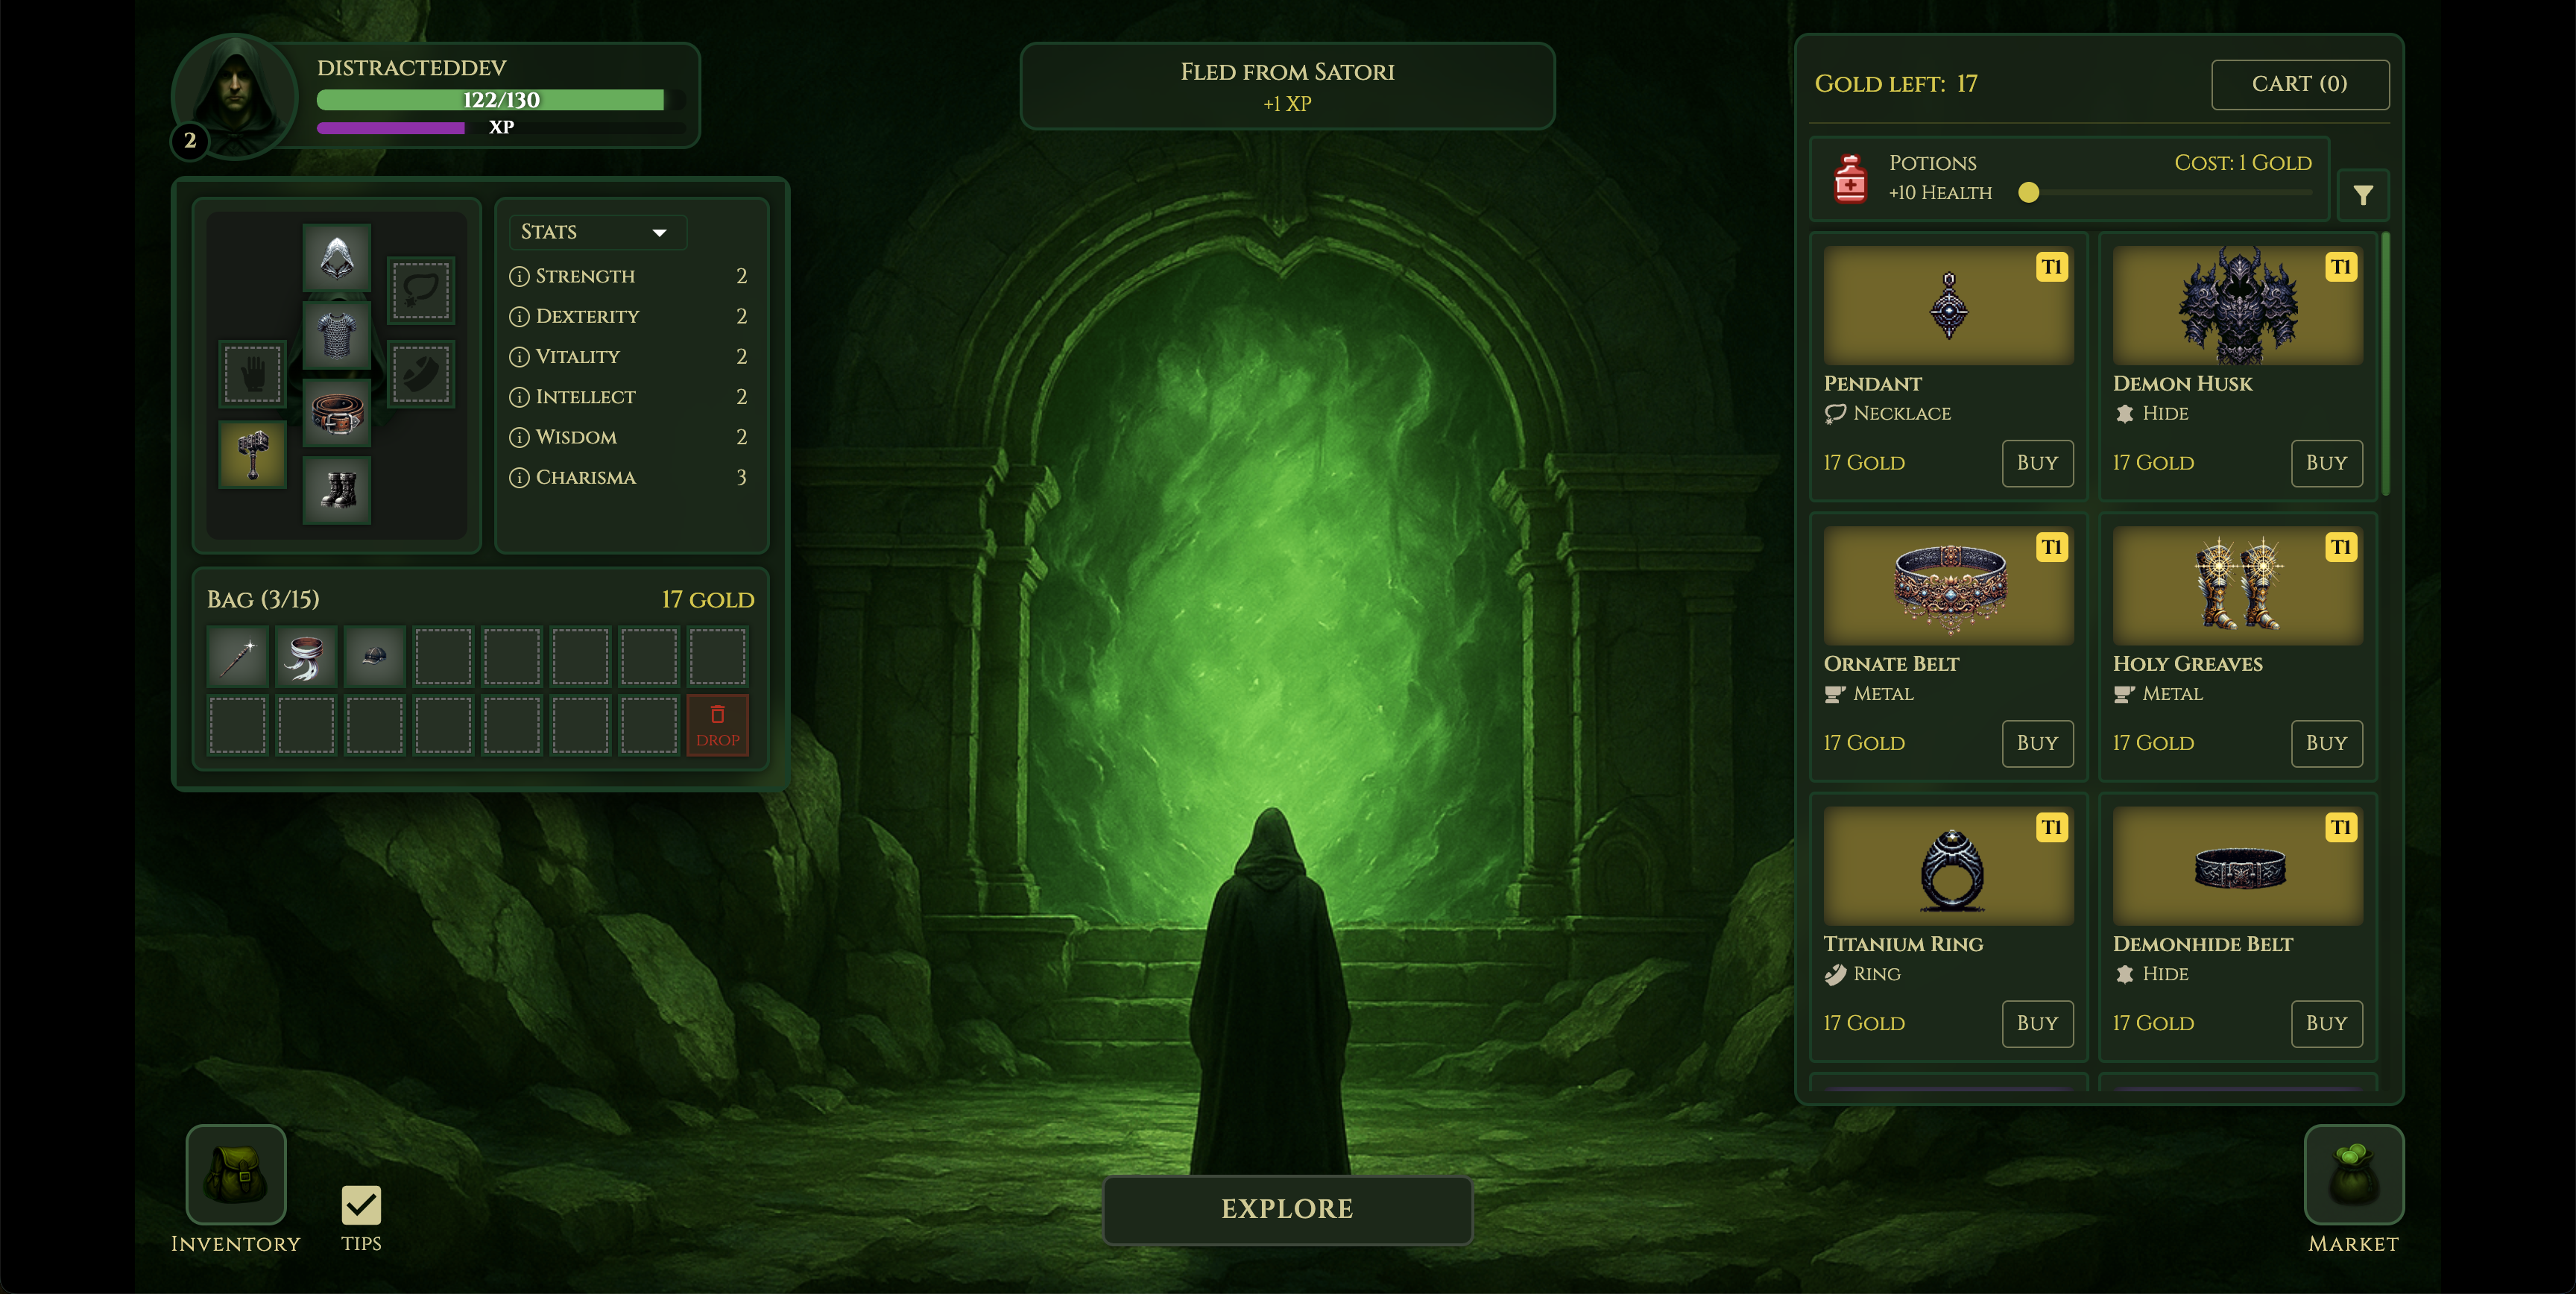
Figure: Exploration interface with adventure log and market
How Exploration Works
When you click "Explore", the game rolls for one of three equally likely outcomes:
- 📦 Item Discovery (33.33%) - Find gold, potions, or equipment
- 🪨 Obstacle (33.33%) - Environmental hazards to overcome
- 👹 Beast Encounter (33.33%) - Mandatory combat encounters
Item Discovery Breakdown
When you hit the 33% item discovery chance, it subdivides into:
- 💰 Gold (45% of discoveries) - Currency for market purchases (~15% of all explores)
- 🧪 Health Potion (45% of discoveries) - Restores HP when used (~15% of all explores)
- ⚔️ Equipment (10% of discoveries) - Weapons, armor, jewelry (~3.3% of all explores)
Discovery Types
💰 Gold Discovery
Formula: Gold = Random(1 to Adventurer Level)
| Level | Gold Range | Average |
|---|---|---|
| 5 | 1-5g | 3g |
| 10 | 1-10g | 5.5g |
| 20 | 1-20g | 10.5g |
| 30 | 1-30g | 15.5g |
| 50 | 1-50g | 25.5g |
- Amount scales with your level
- Can be saved between explorations
- CHA stat reduces market prices
- Essential for equipment upgrades
- Maximum capacity: 511 gold
💰 Gold Cap: You can only carry up to 511 gold. Any excess is lost, so spend wisely!
⚔️ Equipment Discovery
Equipment drops are your primary source of gear upgrades. When you discover loot (3.3% of all explores), the tier distribution is:
| Item Tier | Drop Rate | Of All Explores | Description |
|---|---|---|---|
| T5 (Common) | 50% | ~1.65% | Basic gear |
| T4 (Uncommon) | 30% | ~1.0% | Decent upgrades |
| T3 (Rare) | 12% | ~0.4% | Good equipment |
| T2 (Epic) | 6% | ~0.2% | Powerful items |
| T1 (Legendary) | 2% | ~0.066% | Best in slot |
Item assigning: Items are automatically equipped or added to bag if there are free slots. Otherwise, if items are already discovered or there is no space they are converted to gold.
🧪 Health Discovery
Formula: HP = Random(2 to Level × 2)
| Level | HP Range | Average | % of Max HP |
|---|---|---|---|
| 5 | 2-10 HP | 6 HP | ~0.6% |
| 10 | 2-20 HP | 11 HP | ~1.1% |
| 20 | 2-40 HP | 21 HP | ~2.1% |
| 30 | 2-60 HP | 31 HP | ~3.0% |
| 50 | 2-100 HP | 51 HP | ~5.0% |
- Found in 15% of all explores
- Instantly restores HP when discovered
- Maximum health: 1023 HP (adventurer cap)
❤️ Health Cap: Adventurers have a maximum health of 1023 HP. Health potions cannot exceed this limit.
⭐ Experience Gains
Exploration provides consistent experience points for leveling up:
| XP Source | XP Gained | Scaling | Risk Level |
|---|---|---|---|
| Item Discovery | 1 | None | Safe |
| Beast Kills | Beast Level × (Tier Multiplier - 1) | Decayed | High |
| Obstacles | Same as above | Decayed | Medium |
Beast Encounters
⚠️ Mandatory Combat
IMPORTANT: Discovering a beast during exploration always locks you into combat. There is no way to avoid the fight once a beast is encountered.
Combat is Unavoidable:- Beast encounters force immediate battle
- No option to flee before combat begins
- You must fight until victory, defeat, or successful flee attempt
- See the Battle Guide for detailed combat mechanics
Beast Strength Calculation
When a beast is discovered, its level and health are determined by your adventurer level:
Beast Level Formula
Base Level = 1 + Random(0 to Adventurer Level × 3 - 1)
Final Level = Base Level + Difficulty Bonus| Adventurer Level | Difficulty Bonus | Level Range | Average Level |
|---|---|---|---|
| 1-19 | +0 | 1-57 | ~29 |
| 20-29 | +10 | 11-97 | ~54 |
| 30-39 | +20 | 21-137 | ~79 |
| 40-49 | +40 | 41-187 | ~114 |
| 50+ | +80 | 81-230+ | ~155+ |
Beast Health Formula
Base Health = 1 + Random(0 to Adventurer Level × 20 - 1)
Final Health = Base Health + Health Bonus| Adventurer Level | Health Bonus | Health Range | Average Health |
|---|---|---|---|
| 1-19 | +10 | 11-390 | ~200 |
| 20-29 | +100 | 101-680 | ~390 |
| 30-39 | +200 | 201-980 | ~590 |
| 40-49 | +400 | 401-1023* | ~712 |
| 50+ | +500 | 501-1023* | ~762 |
*Capped at maximum health of 1023 HP
⚠️ Power Spikes: Beasts get significantly stronger at levels 20, 30, 40, and 50. Plan your upgrades accordingly!
❤️ Beast Health Cap: Like adventurers, beasts have a maximum health of 1023 HP.
Ambush Disadvantages
Beast encounters during exploration catch you off-guard with several penalties:
- ⚡ Initiative Loss - Beast attacks first in combat
- 🛡️ No Preparation - Cannot switch gear before combat begins
Ambush Avoidance
Ambush Avoidance Formula:Avoidance Chance = (WIS / Level) × 100%| WIS/Level | Avoidance | Level 10 Example | Level 20 Example |
|---|---|---|---|
| 0.5 | 50% | WIS 5 | WIS 10 |
| 0.75 | 75% | WIS 7-8 | WIS 15 |
| 1.0 | 100% | WIS 10 | WIS 20 |
| 1.5 | 100% | WIS 15 | WIS 30 |
- WIS equal to level = 100% avoidance
- Success rate caps at 100%
- Only applies to beast encounters
- Does not prevent the encounter entirely
👁️ Important: Wisdom helps avoid the ambush penalties, but you will still be locked into combat when a beast is encountered.
Environmental Challenges
🪨 Obstacle System
Obstacles are unavoidable environmental hazards with three distinct categories:
Obstacle Types
✨ Magical Obstacles (25 types)- Examples: Demonic Altar, Vortex of Despair, Cursed Tomb
- Counter: Hide armor
- Examples: Pendulum Blades, Poison Darts, Hidden Arrows
- Counter: Metal armor
- Examples: Collapsing Ceiling, Rolling Boulder, Crushing Walls
- Counter: Cloth armor
Obstacle Level Calculation
When an obstacle is encountered, its level is determined using the same formula as beast levels:
Base Level = 1 + Random(0 to Adventurer Level × 3 - 1)
Final Level = Base Level + Difficulty Bonus| Adventurer Level | Difficulty Bonus | Obstacle Level Range | Average Level |
|---|---|---|---|
| 1-19 | +0 | 1-57 | ~29 |
| 20-29 | +10 | 11-97 | ~54 |
| 30-39 | +20 | 21-137 | ~79 |
| 40-49 | +40 | 41-187 | ~114 |
| 50+ | +80 | 81-230+ | ~155+ |
📊 Note: Unlike beasts, obstacles don't have health - they deal damage based on their level if not avoided.
Damage Mitigation
Obstacle damage uses the same defensive armor logic as beast attacks. If your Intelligence does not avoid the obstacle, treat the obstacle as a beast that appears, attacks the adventurer in a random armor slot, and then flees.
The damage you take depends on both:
- Elemental matchup - The armor type in the hit slot can reduce or increase damage through the normal rock-paper-scissors relationship.
- Armor protection - The base armor power of the protection in that slot is also applied, so stronger armor reduces obstacle damage even when the elemental matchup is the same.
| Method | Effect | Requirement |
|---|---|---|
| Intelligence | Complete avoidance | INT >= obstacle level |
| Armor Defense | Elemental and armor-power math | Armor equipped in the hit slot |
| No Protection | No armor reduction | Empty armor slot |
Summary
Exploration provides the foundation for your Death Mountain adventure through consistent rewards and progression opportunities. Understanding the 33/33/33 split between discoveries, obstacles, and beasts helps you make informed decisions about when and how to explore.
Key Takeaways:- Equal chances for all three outcome types
- Higher levels = better gold and health discoveries
- LUCK influences equipment tier drops
- INT helps avoid obstacles, WIS helps avoid ambushes
- Choose exploration modes based on your current needs