Combat Guide
Combat in Loot Survivor is a turn-based system where preparation meets execution. Every encounter tests your understanding of type advantages, stat optimization, and tactical decision-making. Master the art of battle to survive Death Mountain's deadliest challenges.
🎯 Combat Philosophy: Turn-based combat means every action counts. Sometimes survival means avoiding the fight entirely.
Battle Interface
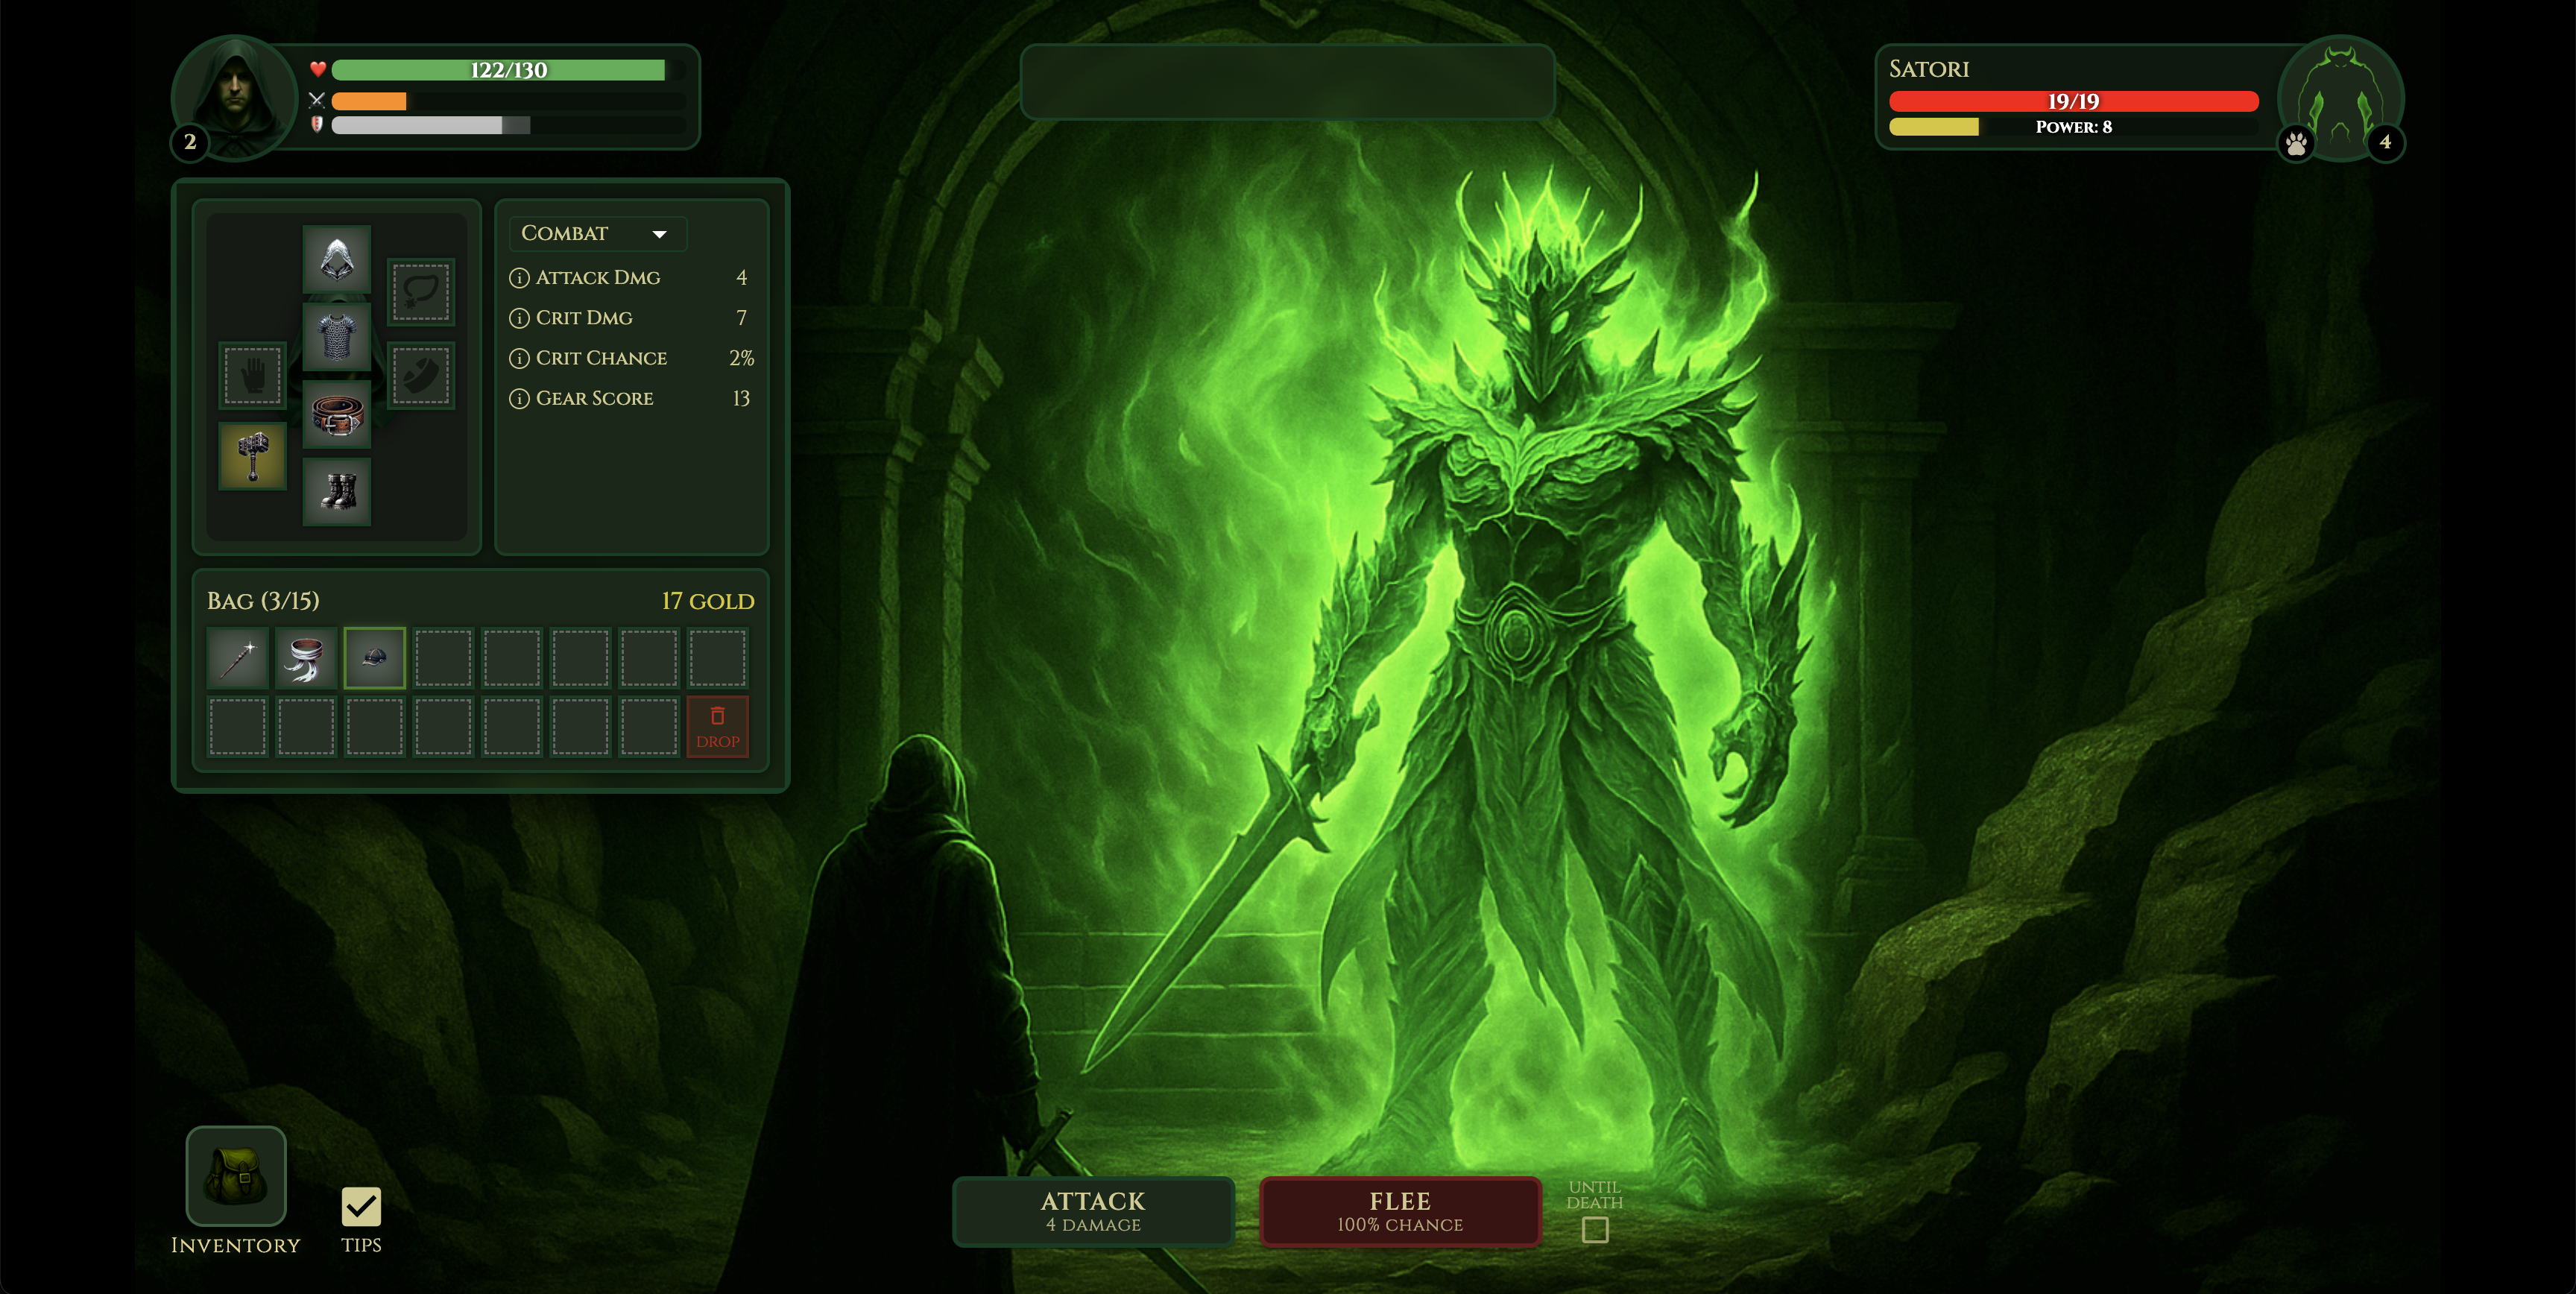
Figure: Battle interface showing adventurer vs beast encounter
Combat Mechanics
Turn-Based Combat Flow
⏱️ Combat Turn Order
Combat follows a strict turn-based sequence where adventurers always act first:
Adventurer Turn - Choose your action:
- ⚔️ Attack the beast
- 🏃 Attempt to flee
- 🔄 Switch equipment (beast gets free attack)
Beast Counterattack - If not defeated or fled:
- Beast automatically attacks back
- Targets a random armor slot (1 of 5: Head, Chest, Waist, Foot, Hand)
- Damage reduced by armor in that specific slot
Repeat - Combat continues until victory, defeat, or successful escape
💡 Key Insight: Since beasts attack random armor slots, having balanced armor coverage is more important than stacking defense in one slot!
Damage System
⚡ Understanding Power
Power is displayed in combat for the base damage before modifiers. It appears as a number on item and beast info showing the raw damage potential.
Power = Weapon Level × (6 - Weapon Tier)
Combat Damage Modifiers
The full damage amount includes several factors during combat:
- ⚔️ Base Damage - Your Power value (Weapon tier × level formula above)
- 🎯 Type Advantage - +50% when strong, -50% when weak
- 💪 Strength Bonus - +10% damage per STR point
- ✨ Critical Hits - LUCK/100% chance for 100% bonus damage (see Combat Mechanics for details)
Type Advantage System
Bludgeon + Metal beats Blade + Hide beats Magic + Cloth beats Bludgeon + Metal
Type Advantage Effects
📈 With Advantage:- Damage Multiplier: +50%
- Example: 20 base damage → 30 damage output
- Visual Cue: Green damage numbers in combat log
- Damage Multiplier: -50%
- Example: 20 base damage → 10 damage output
- Visual Cue: Red damage numbers in combat log
Strategic Equipment Sets
Each armor type excels against specific attacks: Metal resists Blade, Hide resists Magic, Cloth resists Bludgeon. But beware - each has a weakness!
Your weapon choice matters more than armor. Remember: Bludgeon crushes Hide, Blade slices Cloth, Magic pierces Metal. +50% damage is huge!
When hunting specific beasts, matching your full armor set to counter their attacks is powerful. Know your target and gear up accordingly for maximum survivability.
💡 Pro Strategy: Early game, prioritize covering all armor slots with appropriate types over hunting for higher tiers!
Combat Actions
⚔️ Attack Options
Single Attack
Execute one calculated strike against your opponent.
Stat Influences:- STR: +10% damage per point
- LUCK: Critical hit chance (LUCK/100%)
- Weapon Tier: Base damage multiplier
Best for: Controlled combat, testing damage, conserving resources
Attack Until Death
Chain attacks automatically until victory or defeat.
⚠️ High Risk Mode:- No control once initiated
- Fight continues until resolution
- Cannot flee mid-sequence
- Beast health is very low
- You have type advantage
- Confident in victory
- Emergency/desperate situations
🏃 Flee Mechanics
Flee Formula:Success Rate = (DEX / Level) × 100%| DEX/Level | Success | Level 10 Example | Level 20 Example |
|---|---|---|---|
| 0.5 | 50% | DEX 5 | DEX 10 |
| 0.75 | 75% | DEX 7-8 | DEX 15 |
| 1.0 | 100% | DEX 10 | DEX 20 |
| 1.5 | 100% | DEX 15 | DEX 30 |
- DEX equal to level = 100% success
- Success rate caps at 100%
- Failed flee attempts waste a turn
- Ambush encounters have no additional penalties
🛡️ Equipment Switching
You can change your equipment mid-combat to gain type advantages, but the beast gets a free attack when you do. Strategic swapping can turn a losing fight into victory - switch to counter their type for +50% damage or -50% damage reduction.
💡 Important: Bundle all gear changes into one action to minimize the number of free attacks the beast gets. Multiple switches still only give the beast one free attack!
Combat Decision Making
When entering combat, consider these factors:
- 🏃 Flee - When you have low HP, type disadvantage, or facing a stronger beast
- 🔄 Switch Gear - When you have the wrong equipment type and need advantage
- ⚔️ Attack - When you have good matchup and are confident in victory
- 💀 All-Out Attack - When beast has very low HP and victory is guaranteed
Combat Rewards
Experience Points (XP)
💰 Victory Rewards
Defeating beasts grants XP and gold based on their power, with bonuses for finding items:
Adventurer XP = Beast Power / 2
Item XP = 2 * Adventurer XP
Gold = Beast Power / 2 (same as XP)
XP rewards decrease as you level up (2% per level, max 95% reduction)
Gold rewards do NOT decay - always full value!
Reward Calculation Examples
| Your Level | Beast (T3, Lv10) | Base Rewards | XP After Decay | Gold (No Decay) | Item XP |
|---|---|---|---|---|---|
| Level 1 | Power: 30 | 15 | 15 XP (0%) | 15 🪙 | 30 XP |
| Level 10 | Power: 30 | 15 | 12 XP (-20%) | 15 🪙 | 24 XP |
| Level 25 | Power: 30 | 15 | 7 XP (-50%) | 15 🪙 | 15 XP |
| Level 50+ | Power: 30 | 15 | 1 XP (-95%) | 15 🪙 | 2 XP |
💡 Tip: The XP decay encourages fighting appropriate challenges, but gold rewards stay consistent - making every victory valuable!
Summary
Combat success in Loot Survivor comes from understanding type advantages, optimizing your stats, and making tactical decisions. Every battle offers multiple approaches - from switching gear for advantages to knowing when discretion is the better part of valor.
Key Combat Principles:- Type advantage provides significant damage bonuses/penalties
- STR scaling makes strength investment worthwhile for damage dealers
- DEX equal to your level guarantees successful escapes
- Gear switching can turn losing fights into victories
- Sometimes the best fight is the one you avoid